
To create fine art prints using an archival, giclée printing process, you need a digital file that is sized to the printing dimension, at 300 pixels per inch and in a wide gamut color space such as Adobe RGB color space. You may be tempted to take an iPhone photo, shoot your artwork using a digital camera without a full studio setup, or scan with a consumer-grade flatbed. These results may deliver a file size that is unevenly lit, misaligned to the camera, low resolution, and/or not color accurate, so we highly recommend completing Art Captures in order to print reproductions of your gorgeous, original artwork.
#1: Capture
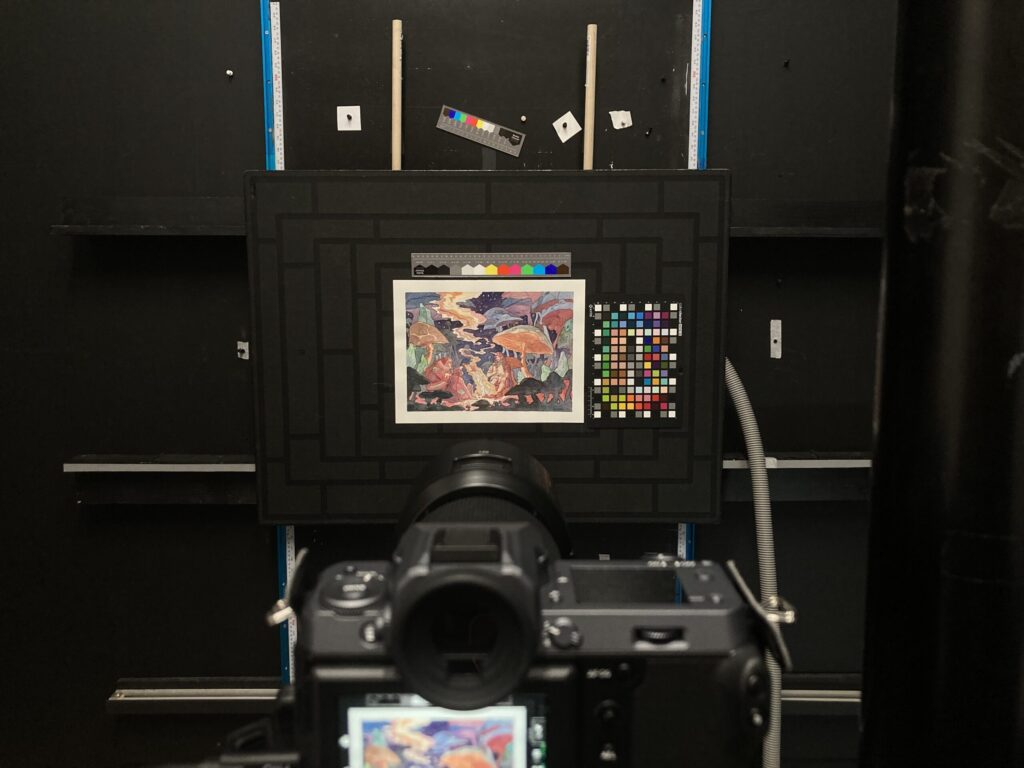
So what is capture!? A capture studio shoot involves an easel set up, camera aligning tools, professional lighting, and color matching cards, all in a matte black room to ensure color accuracy. Your artwork is placed perfectly parallel to the high-megapixel camera lens, held flat by gentle studio tools, and shot with color reference targets in frame. The camera and the lights are polarized to guarantee the closest color match.
Artist: Morgan Lataillade
#2: Color Matching for Screen
Next, we visually match your piece to the digital file we have captured, using a Reality Checker. This tool is a color card printed with specific hues and tones that creates a colorimetrically accurate match when a technician digitally edits the image to it. While editing, our technicians must use a color calibrated screen, and recalibration of the screen must be completed regularly. Once a round of colorimetric editing is completed, the technician double checks their work, looking from the screen to the artwork, and edits till the screen matches the artwork.
If the file was delivered to the client at this stage of completion, Candela would call it a “Capture Only” project, vs a “Capture and Print” project. These digital files would be sized quite large, and perfect to display on an artists’ website. They could also be given to a book editor who uses a CMYK printing process, or to be sent to bulk printing companies that do not use fine art papers. If we print a matched-for-screen file in our studio, there is a likelihood that it will not match the original in every aspect, as color matching for print has not been completed.
 Artist: David Yeung
#3: Color Matching for Print
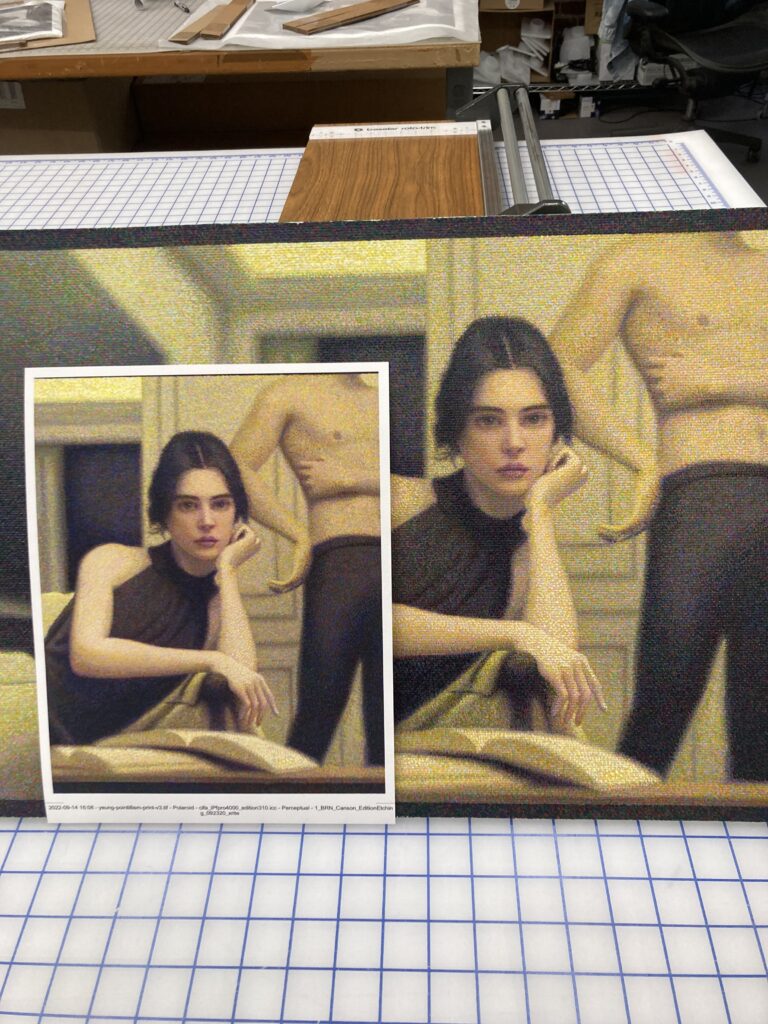
Editing for print should be completed in our studio once an artist has chosen a paper they would like to reproduce their piece onto. Generally, we recommend textured matte papers for oil, acrylic and watercolor paintings, smooth mattes for illustrations and drawings, and satin photo paper for pieces with high relief or unusual textures (eg. tapestries). Each paper has a different base tone/color profile, and requires different edits for color matching.
To match for print, we complete a series of small test prints, and medium test strips, with rounds of digital editing in between, if needed. As the file goes to print, a custom color profile is applied to the file which should account for most shifts in color, but double checking against the original ensures the closest match. Often, edits like boosting black when printing on matte paper, or making tones less yellow when printing on a warmer paper base, help deliver the best match possible.
For “Capture and Print” projects where the client knows which paper they would like to print on in our studio, we include a test printing charge to cover this stage of proofing and editing.
 Artist: Julie Feferman
#4: Printing!
Once proofing has been completed, we can go to print! View our printing price list here.
#5: File management
Once we complete your project, we give you the files via a high-quality download link. We keep your files stored in our server for up to a year, but you must keep them stored safely for your long term records. Ideally the files should be saved in multiple locations (eg. Google Drive, or Dropbox, or a hard drive/flash drive).

Artist: Jennifer Roberts
Extra Considerations: METALLICS, 3D OBJECTS, NEGATIVE WHITE SPACE
To accurately reflect the amount of time it takes to complete custom studio setups and edit for your unique artwork, we sometimes add charges to your invoice. These charges are applied to capture projects that include metallic media, extremely large pieces, heavy relief/three dimensional aspects, uneven edges/tears, works with large areas of white, and if you will need digital upsizing before going to print (eg. you have an 8” x 10” original you would like to print at 40” x 50”).
If your artwork is particularly large, it may be shot in multiple captures and seamlessly edited to create one final image. An additional variable to consider is metallic elements: if your artwork has shiny paint or a media like gold leaf, a technician must take extra shots and edit them together. Three dimensional elements including paintings with high relief require different lighting setups. All of these elements must be considered when invoicing, shooting, editing and delivering art capture files.
Please reach out if you would like a quote for your custom project. studio@candelafineart.com | 510.227.8334

